If you are looking for the best type of eyelash curler for your everyday lashes needs, then you should get the heated type of eyelash curler. This is because the heated curler uses heat to make the eyelashes lengthier and their curls stay longer.
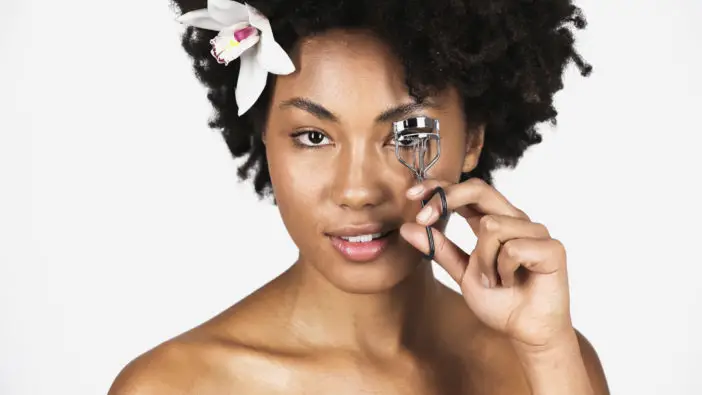
Every woman has a list of must-have things to have in their makeup bag for their everyday makeup. However, not everyone sees the importance of having a curler in their everyday makeup tools.
There is a misconception that only professional makeup artists should have a curler in their makeup bags. This is untrue. Whether or not you are a professional makeup artist, having an eyelash curler will do you good.
SEE: How to Put On Eyelashes: The Complete Guide for Beginners
How to Use Eyelash Curlers

There are different types of eyelash curlers. We have the traditional, precision or point, and heated curler. While these curlers are similar in their application in different ways, they have their distinct features.
How to Use Traditional Eyelash Curler
The traditional type of eyelash curler comes in a scissors shape with a clamp on the end. It comes in two versions which are plastic and metal. However, the process involved in using both types of traditional lash curlers is the same.
Step 1: Get a quality eyelash curler
As earlier stated, the first step to using an eyelash curler is to get a quality eyelash curler. Getting a quality curler gives you confidence and the result is as good as that of a professional. As a beginner, a quality curler helps you to achieve a luscious and most effective lash.
Step 2: Hold your curler up to your eyes
It seems like you don’t have to be told how to hold your curler, right? However, not everyone knows that the curler should be held by putting your thumb finger in one hole and the middle finger on the other than up to your face. It is held the way you hold scissors.
Holding your curler properly and in the right position will help you achieve the right effect on your eyes and make it easier and simpler.
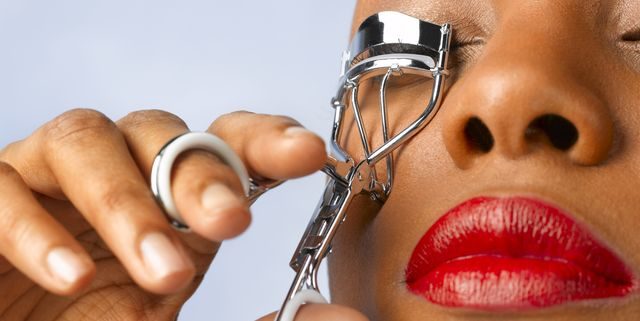
Step 3: Open up the eyelash clamp
The curler clamp should be opened up so that your eyelash can fit in between. Get as much lash as you can in between the clamps from the base of the lashes. Be careful not to get close to your skin, so that you don’t hurt or pinch yourself.
Step 4: Close the clamp of the curler
After making sure your eyelashes fit in the clamp, close the clamp and it down. You have to hold the curler down for 10-15 seconds. It can take longer if you have straight hair.
You should be careful so that while holding the curler down, you don’t squeeze on your skin. Also, make sure that you are getting the clamp as close as possible to the root of your lashes.
Step 5: Curl your eyelashes in 3 sections
You can curl your hair in three sections because you may not be able to get the whole lashes curled at once. So, it is advisable to curl the hair in three sections to get a more effective curl.
Start from the root of the lashes; hold down the clamp with your lashes for 30 seconds to curl your lashes upward. Repeat this process for the three sections.
SEE: How Do Magnetic Eyelashes Work: The Pros, Cons, and Tricks
How to Use Heated Eyelash Curler
The unique feature of the heated eyelash curler is that it makes the eyelashes curl easily as well as makes them stay curled for a longer period. It looks more like a mascara brush.
Step 1: Choose the right heated curler
The idea of having a heated material close to your eyes makes you want to flinch. This is one of the reasons why getting the right and originally heated curler is very important so that you don’t hurt yourself in the name of getting a fine eyelash.
Step 2: Make sure your lashes are clean.
After choosing a quality heated curler, it is important to make sure that your lashes are clean. The best way to prep yourself is to be sure your lashes are clean and dry.
Ensure that your eyelash doesn’t have residue of mascara from the last event. Keeping your lashes clean can help prevent fallout because breakage can occur when mascara is mixed with heat.
Step 3: Test the temperature of your heated curler.
It is important to test the temperature of your heated curler. Make sure to tap the curler to feel the temperature before taking it close to the eyelid. This is just to ensure that the temperature is not enough to burn your eyes.
Step 4: Press down the curler
To use the eyelash curler, you have to hold the curler open, turn it in a back and forth motion until it reaches the eyelash, and press down for 30 seconds. This will give a dramatic effect on your lashes.
Step 5: Don’t over curl your lashes.
The scariest part of using the heated eyelash curler is having your hair stuck to the device. To prevent this from happening, it is good to let in some moderation. Don’t overuse the curler to prevent your eyelashes from breaking out. Using it once or twice a week is perfect.
SEE: What Is an Eyelash Lift? Secrets Revealed
How to Use Precision or Point Eyelash Curler
This curler is also known as a mini lash curler. It is shaped similarly to a metal machine with scissors hands and clamps at the end. The difference between this type of curler and a metal curler is that one has a narrow flat clamp.
The steps involved in using precision or point eyelash curlers are the same as a traditional and heated eyelash curler. However, because it’s a mini curler, you don’t need to clamp your lashes as a whole; you rather curl your lashes section by section.
This type of curler is perfect for people who apply false lashes. This is because there is less risk of them breaking off or coming off at the clamp.
How to Use Eyelash Curler on Short Lashes
Worried that your lashes are small and curlers may pinch your eyelids? Here is how to curl your short lashes without stress.
Follow the processes involved in curling with any type of curler. However, take extra care to ensure you have all your lashes are in the curler at the point of clamping the lashes.
Once you have all hairs in the curler, press on lightly in pulsing motion so that you won’t stress out your eyelids. To achieve the best look, curl your lashes at different points of length and width, i.e., Tip of the lash and at the ends of the width.
Finish off the look with a water-proof mascara. This is important for short lashes because mascara helps to keep your short curls in place for a substantial period.
What to Do After Using Eyelash Curlers
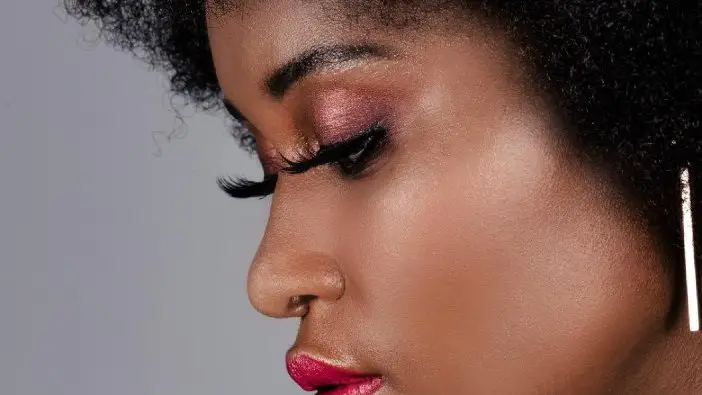
Lifting or curling your eyelash is part of the process of making up. After you must have curled your lashes to the root, ensure you don’t pull on your lash in the process. Let it go completely after about five seconds.
Having completed the process of curling, go ahead to apply mascara and eyeliner if you so desire. Mascara and eyeliner enhance your curled lashes, making them fuller and darker if you have a scanty or brown eyelash.
Please note that using mascara after curling your lashes with a curler, is totally up to your discretion. If you are satisfied with how your lashes look after they are curled, you are good to go about your day looking all dolled-up.
Never forget to clean your lash curler after every use. This is because the eye is a sensitive part of the body that can be infected if contaminated equipment is frequently used.
SEE: How to Put On Eyelashes: The Complete Guide for Beginners
Getting a Good Eyelash Curler
You may not know this but getting a good quality eyelash curler is the first step to using an eyelash curler. The quality of eyelash curler you use will determine the quality of the result you will get when you use it.
There are many brands of eyelash curlers; however, some are of better quality than others.
A high-quality eyelash is mostly made of metal with rubber pads on the clamps. Don’t ever make the mistake of getting a plastic or rubber eyelash curler; except your skin is sensitive to such.
A rubber or plastic curler will not give you enough grips to curl lashes. A plastic or rubber curler tends to break easier than a metal eyelash curler.
In addition, not all metal eyelash curlers are of good quality. Some can look too thin and not strong enough to give you the effect you want for eyelashes.
Eyelash Curler Tips
Here are some effective tips on how to use any type of eyelash curler like a pro:
- Ensure to select a curler that best fits your makeup routine. For example, you should settle for heated curler if you don’t have time to curl daily.
- While using the curler, ensure to tilt your head backwards before filling the curler with your lashes.
- Ensure you get to the root of your lash to get a smooth curl.
- Gently release your curler and apply mascara if you will.
- Clean your curler after every use to prevent infection after frequent use.
SEE: Best Makeup Kit in All Sizes You Could Possibly Want
FAQs
How long should you wait after clamping your eyelashes with a lash curler?
This depends on the curler type you are using, you can clamp your eyelashes for 10 seconds to 45 seconds.
If you are using a metal curler, you will have to clamp your lashes for 10-15 seconds. A plastic curler will take 45 seconds longer and a heated curler only requires you to hold down for 3 seconds.
Do you need to add mascara after using a curler?
No, you don’t. You don’t need to add mascara after using a curler on your lashes; since the curler does part of the mascara’s job.
Adding mascara after using a curler will make the curl more define and darker. However, it is not compulsory to wear mascara. Either way, you are good to go with or without it.
How do you know when you’re getting to the root of your lashes?
You have gotten to the root of your lashes if the curler pricks any part of your skin while you are looking for a balance.
You can tell most times when you are touching the root of your lashes. It will be helpful if you slowly release the clamp if the curler pinches your skin.
How can you get your curled lashes to last longer?
Yes, you can. You can get your curled lashes to last longer by applying mascara after curling. However, there is no specific duration to the longevity of your curled lashes. Some curled lashes last for a week or more while some straighten out the following day.
Factors affecting the longevity of your curls are the types of lashes you have, the type of curler used, and the application of mascara. Applying waterproof mascara will help your curls last longer.
Conclusion
How you use your curler depends on the type of curler you have chosen for yourself. Each curler has a strategic way of using it. Every curler type has its benefits.
A metal eyelash curler will make your lashes well defined while a plastic curler will take longer to get a well define curls. Heated curls will give you long lashes.
However, don’t make a habit of using an eyelash curler daily. Excessive use of lash curlers; especially the heated ones, can result in breakouts, eye-related illnesses, shedding of lashes, etc. Using a heated curler once a week will keep your lashes curled for the week.
Thanks for reading.
Africana Fashion provides beauty articles with tips to improve your makeup and beauty lifestyle.